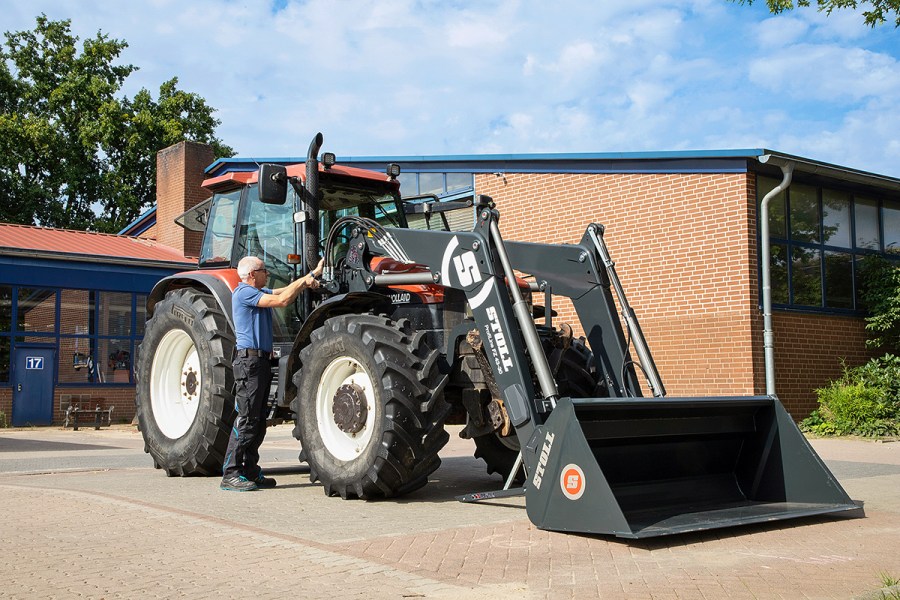
Finding a suitable second-hand tractor with a loader already in place can shorten the prospective shopping list. But fitting a new or used front loader can be relatively simple. We look at what was involved in mounting a new Stoll on a classic New Holland M135.
KEEPING IT BRIEF
- Stoll has been using the same mounting bracket system for over 40 years.
- The bracket/boom width hasn’t changed and is still either 916mm or 1,100mm. This makes it possible for old/new boom and brackets to be used together.
- Tractors without load-sensing hydraulics can use a constant flow pump to supply the spool through the main pressure line.
Front loader manufacturer Stoll offers mounting brackets for almost 6,000 different tractor models, including machines that date back to the 1960s. So, finding the correct loader brackets for the featured 1998 New Holland M135 wasn’t a major problem. Indeed, the universal hole pattern means these are also compatible with further New Holland model ranges, including the TM models.
Depending on the tractor, the brackets can be supplied with extra bracing connecting to the rear axle — as standard or optional spec. The M135 model needed such a brace. Standard spec in the kit also includes a robust grille guard.
Three model ranges
Stoll’s front loaders come in three model lines that tot up to as many as 35 models. The entry-level is the CompactLine FC range for small tractors of up to 25hp. The next level lines up the lightweight Solid loaders for 35-135hp tractors, which are available with and without parallel control.
The top end is the ProfiLine FS/FZ line for 50-300hp tractors. The difference between FS and FZ is parallel lift control. Unlike the FS, which doesn’t have parallel lift, the FZ models do with a Z-linkage. The control arms are mounted beneath the pivot pin and are housed inside the upper sections of the loader arms and emerge from there at the bend. The crowd/dump rams are mounted at the end of the levelling linkage, improving overall visibility and attachment precision. The ProfiLine loaders are also available with ISObus controls.
Loader specifications
For this article we are retrofitting a ProfiLine FZ43-30.1 to the M135. Here’s what the model numbers mean: the number ‘43’ hints at a lift height of up to 4.3m at the pivot point, ‘30’ for up to 3.0t lift force at ground level and ‘.1’ for the loader’s drive-in width of 1,100mm.

Worth a mention is the boom cushioning feature, which is provided by a damping cylinder in the cross beam. Unlike nitrogen dampers, the system can remain activated even with heavier loads courtesy of an end stop for the piston rod and yet enough space for the nitrogen to escape. A tap under a plastic flap on the left enables manual deactivation of the damping system, when using a bucket for grading, for example. This on/off can also be done as an electric extra-cost option.

An electro-hydraulic single-lever joystick valve block is also available. Lars, the M135 owner, opted for a mechanical single-lever joystick with Bowden cables. Buckets and other attachments lock semi-automatically when the carriage is tilted back. A hydraulic quick attach is also available.
The loader itself locks on to the tractor brackets, with a double lock using two extra hooks that lock into place for improved stability against downward acting forces, such as when cutting silage with a shear grab. This is an option on medium-sized loaders, whereas it’s standard on heavy-duty loaders.
How much?
The ProfiLine FZ 43-30.1 discussed here is a medium-sized loader that costs £14,590. The price includes the brackets, the spool but not the installation.
Alexander Bertling
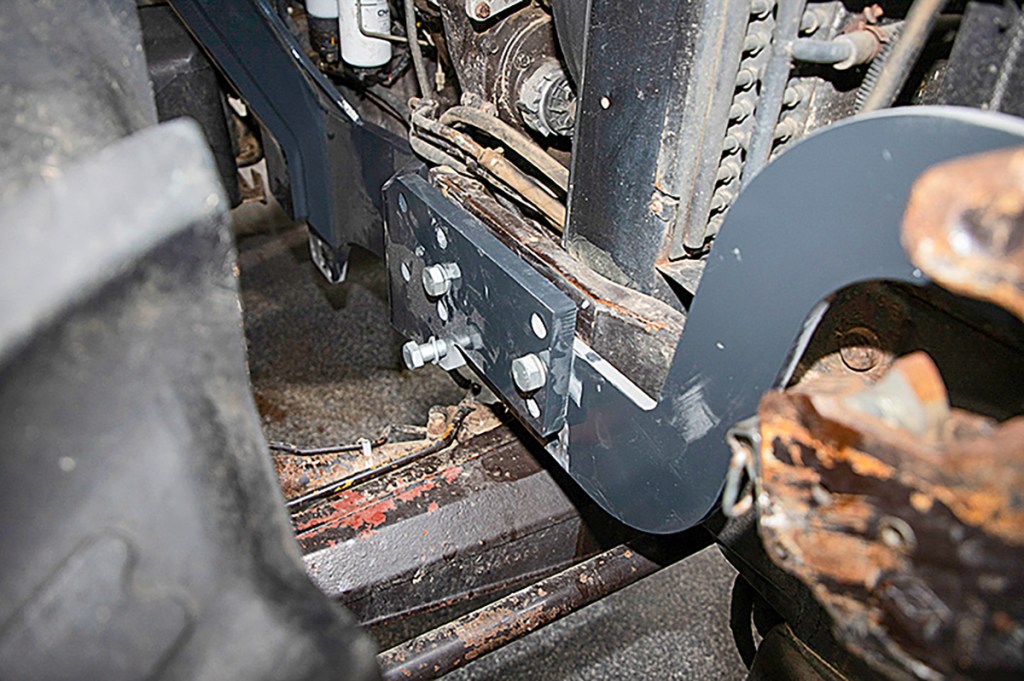
1. FITTING THE BRACKETS

On the New Holland M135, the first step is to remove the side plates for the front linkage. These are replaced by the loader brackets. Clean all mating surfaces on both the brackets and the tractor. For better access, remove the cab steps.

The mounting holes on older tractors in particular are often dirty or the threads are corroded so clean and prepare them using an M20 tap or an old bolt. If using a bolt we would recommend cutting a diagonal notch into the first few threads. As you thread in the bolt, the grime will escape into the cut notch. Repeat this several time to clean each hole.
Then position the brackets onto the tractor and insert the bolts supplied into the rear holes; insert but do not fully tighten them, because the grille guard needs installing first before the three bolts are tightened.
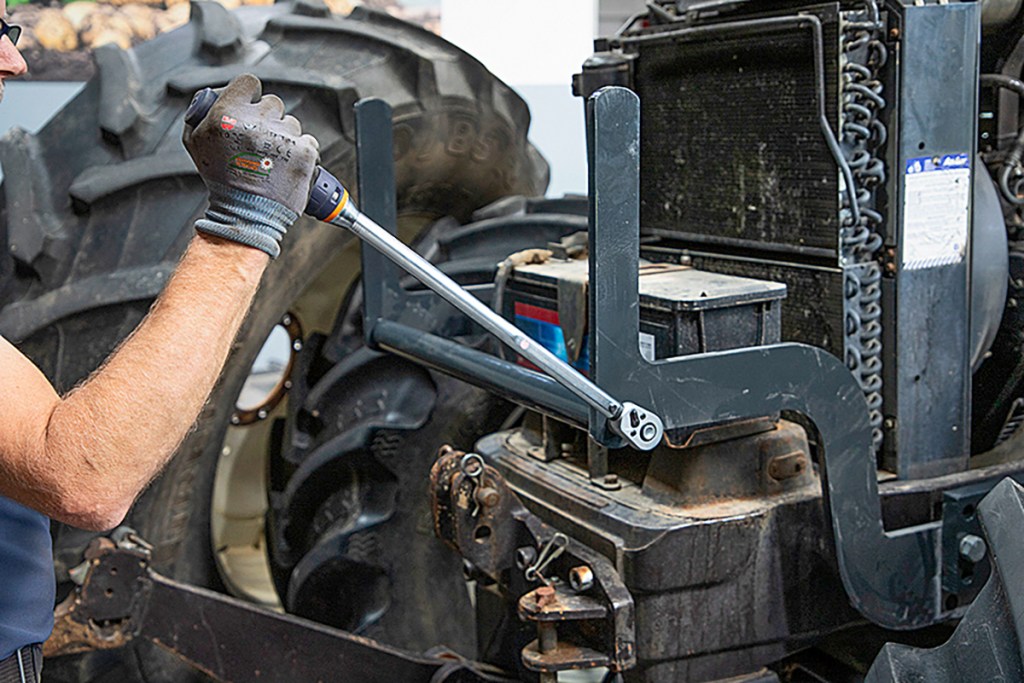
Next, bolt the cross tube between the grille guards. Afterwards tighten all bolts to the specified torque (do not put grease on the threads).
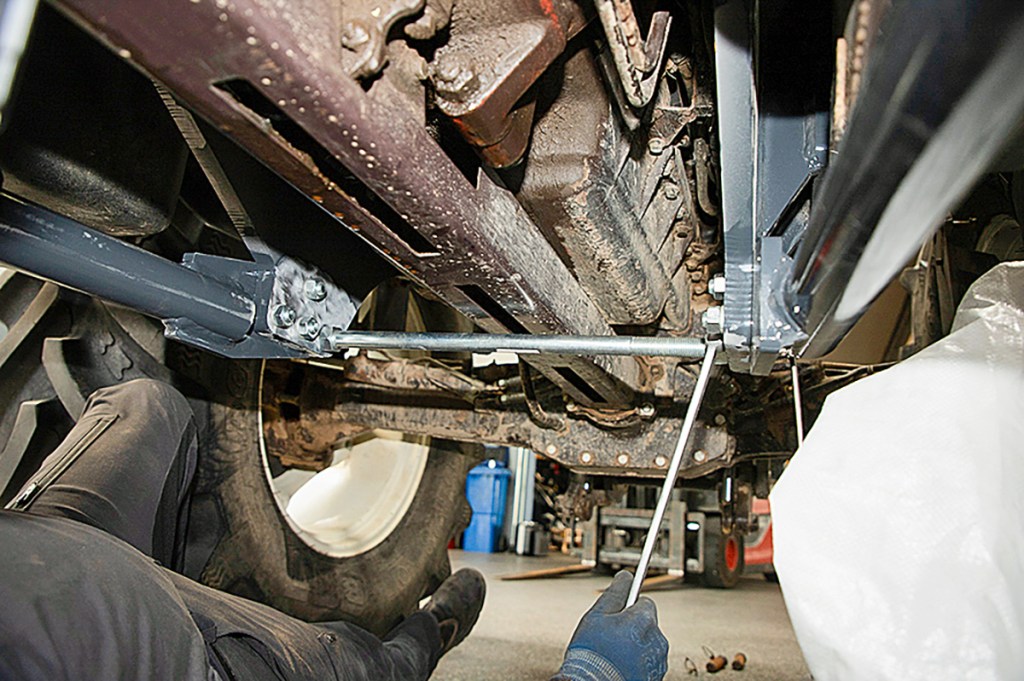
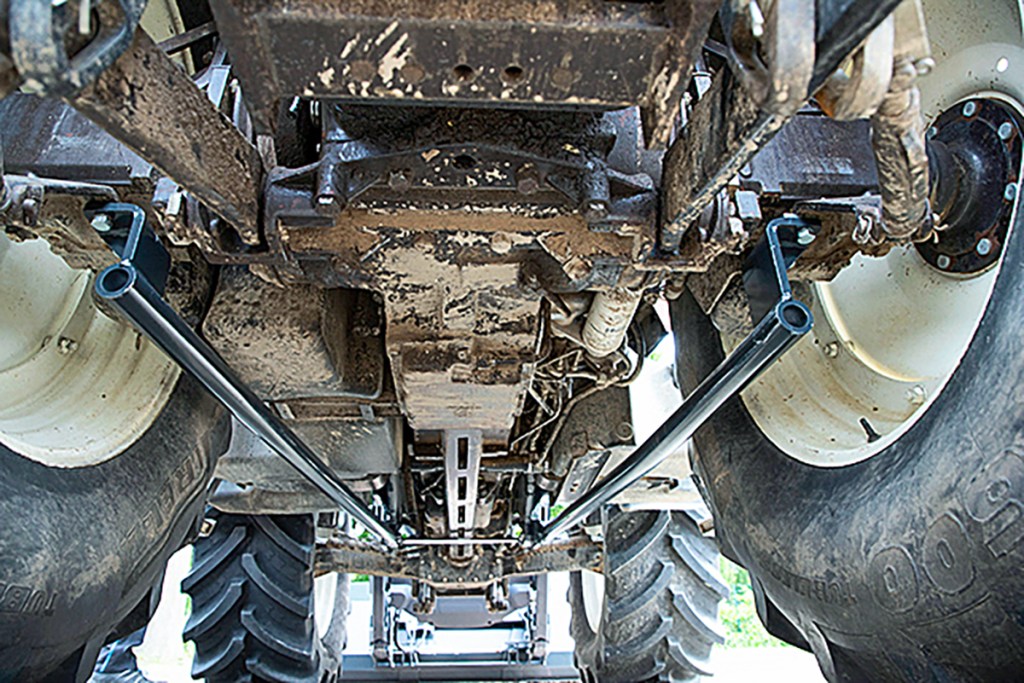
Attach the cross bracing at the front (to the brackets) and the rear (to the threaded holes under the axle trumpet housings). A rod forms the cross brace under the clutch bell housing.
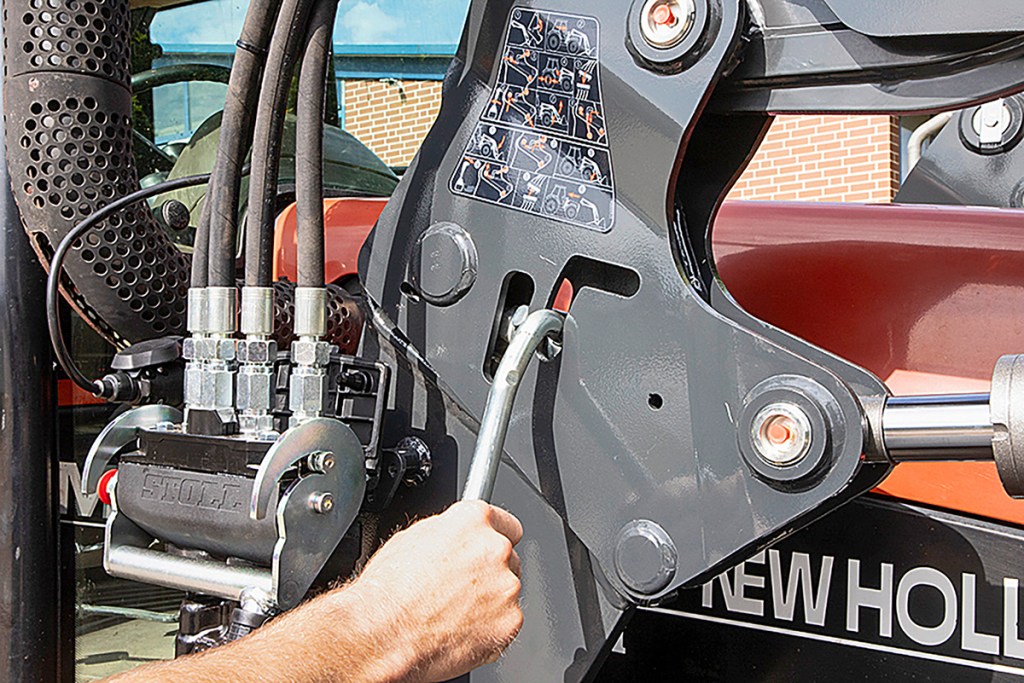
2. HYDRAULICS
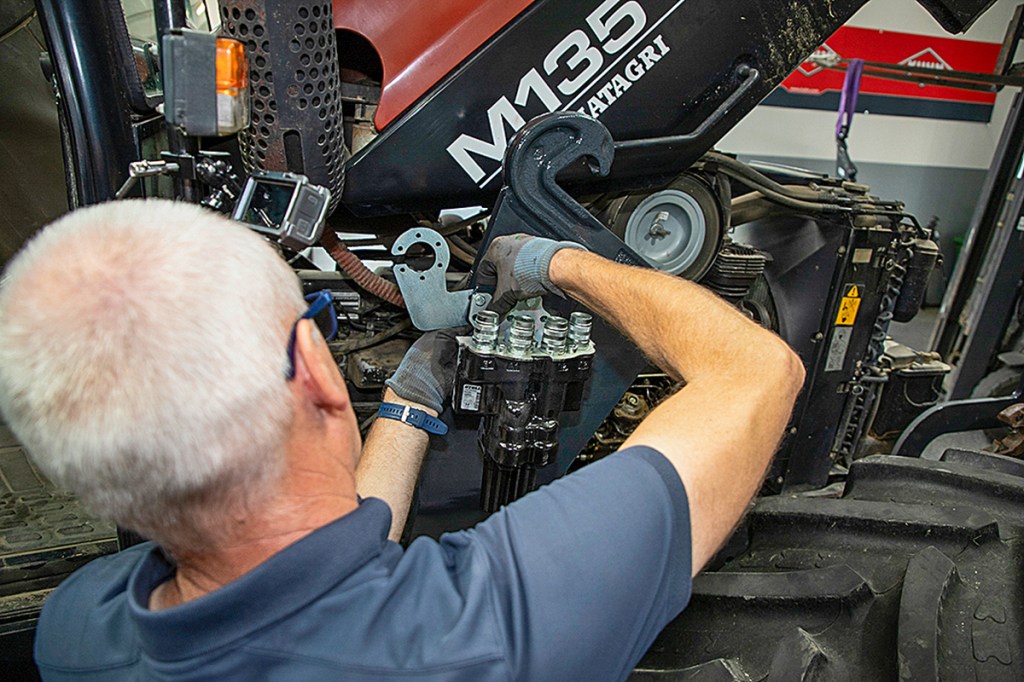
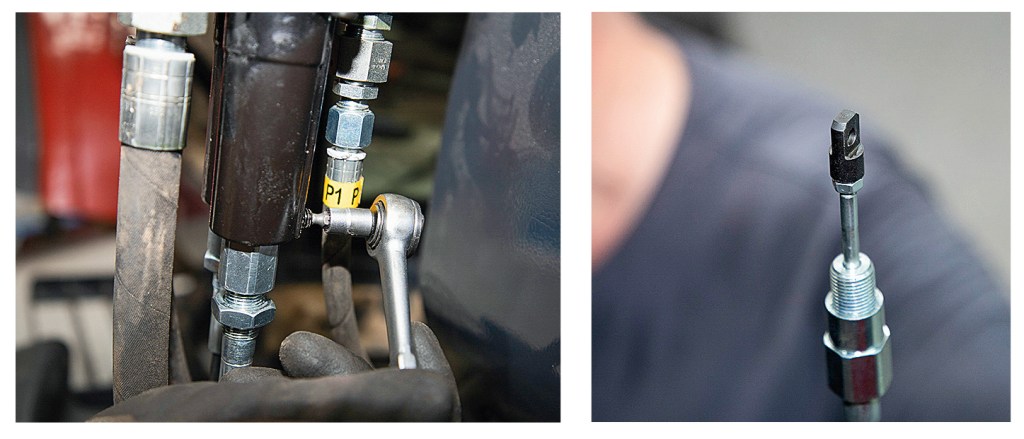
The right-hand tower has mounting holes for the valve block. This is where you also fit the holder for the socket that powers the third service.

This tractor has a closed centre load-sensing system. Oil supply is accessed at the tractor’s back-end via two Tees for pressure (P) and return (T) lines. The control line (P1) is looped into the system with a signalling shuttle valve. In profi 9/2024, we discussed retrofitting Power Beyond connections and the details of adding consumers to the hydraulic systems. The three lines are routed under the cab to the valve block using the labelled connections.

3. INSTALLING THE JOYSTICK
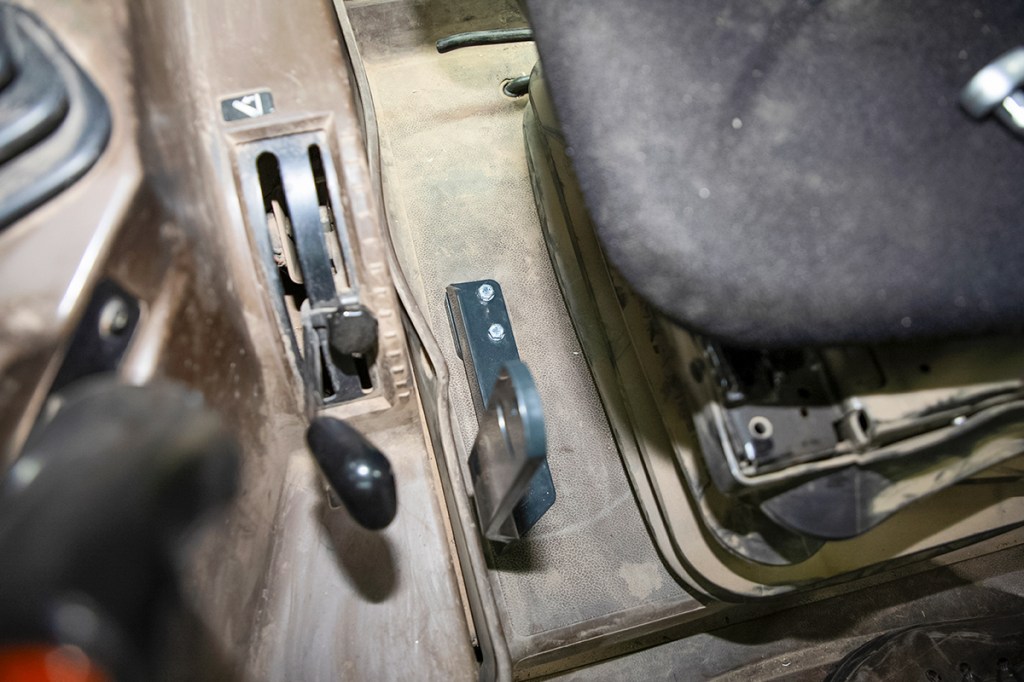
Stoll offers two mounting options for the joystick in a M135 — one is by the right mudguard, the other on the cab floor. We chose the cab floor mount, attaching the bracket to pre-threaded holes after cutting out a suitable patch from the floor.
On the valve end, the cables have holders that are secured with a pin. There is a decal on the valve that indicates which cable goes in which port. Cable lengths are then adjusted on the screw housing. You can use the locking position of the single lever joystick as a guide for finding the correct length: the lever should engage easily when in neutral. After that, the housings are secured to the spool valve and stopped from turning by grub screws. Make sure not to overtighten these.

The solenoid valve for the third hydraulic service is powered via the cigarette lighter terminal on the right-hand side console. From here, the single-core wire is routed to the cab floor and connected to one of the three-core wires to the seven-pin socket. The two remaining wires are connected to the two-core wire in the joystick to control other services. The earth wire on the socket is connected to a bolt using a ring connector. In this case, the two switches in the joystick are both connected to one wire for the third hydraulic service. Either button will not operate the third service.
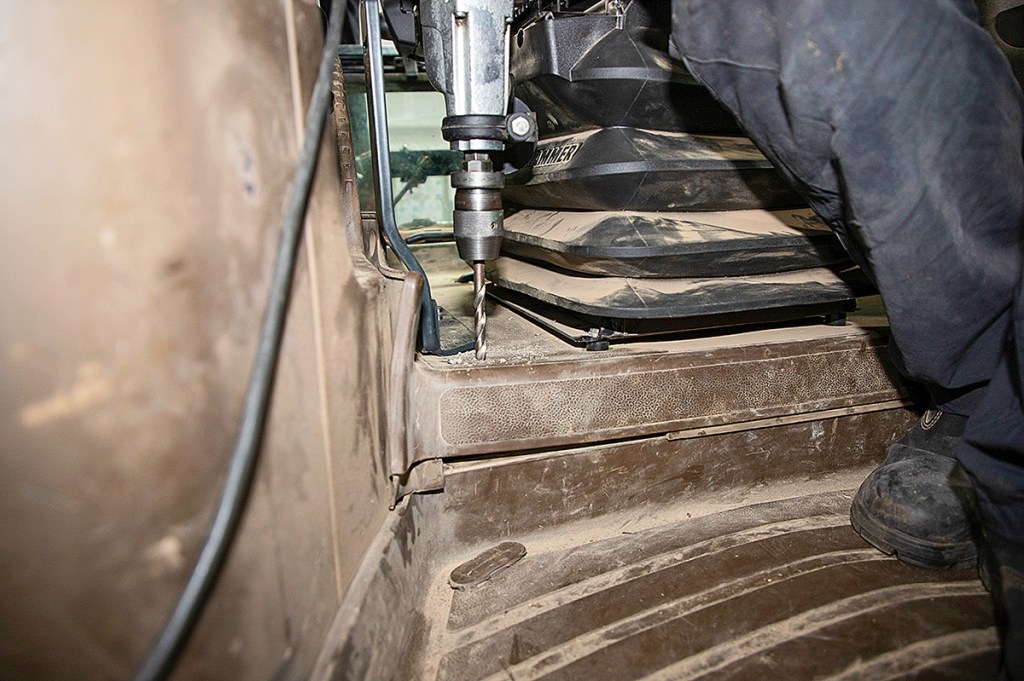
Drill two 14.5mm holes in the floor for the Bowden cables and, if required, drill a smaller hole for the third service cable.
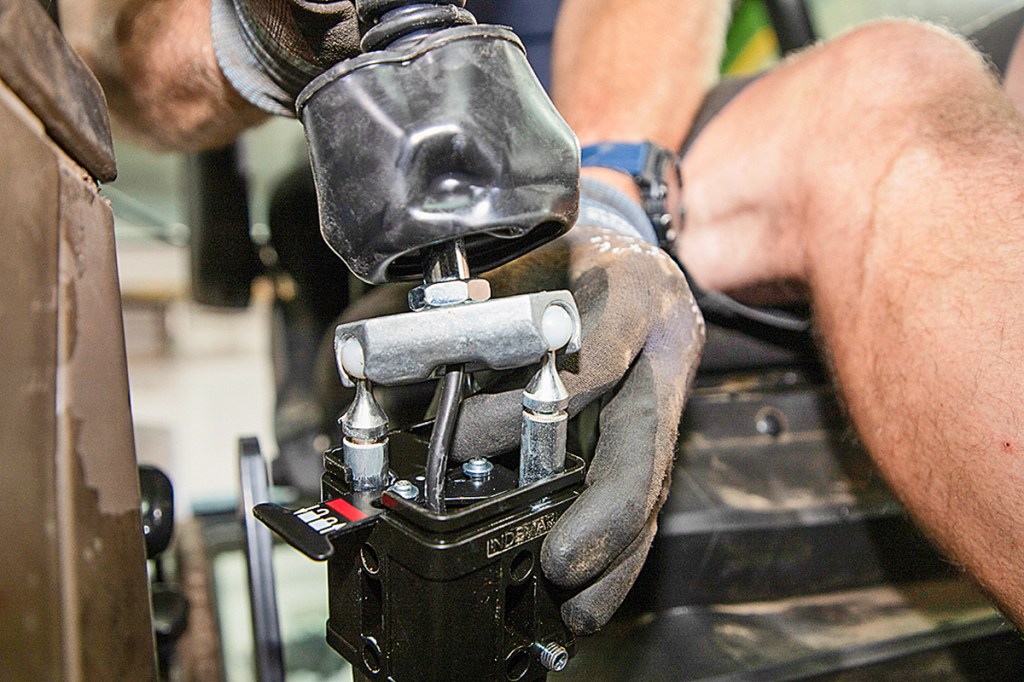
The joystick is attached to the bracket with two bolts. As a next step, push the Bowden cables from underneath into the cab. Make sure you position the cable balls correctly in their mounts. The cable pictured at the front right lifts and lowers the boom, the one at the left rear tips the attachment. You can secure the cables with grub screws by screwing these into their grooves after fitting the cable end balls into the cross control housing.

As a last step, file the mating surfaces of the coupling hooks to remove the paint and apply some grease. A forklift truck is a great help here, because the loader must not rest on its parking stands without an implement attached. Finally, install the multi-coupler and connect the electric seven-pin socket. The loader is now ready for its first function test.
For more up-to-date farming news click here and subscribe now to profi and save.