As well as the Juwel 8, Lemken also has the 8i version, with the ‘i’ referring to ISObus. In a brief test we discovered what the ‘i’ can achieve.
When the Juwel range of loughs was introduced back in 2010, Lemken added a number of electronic features for the first time on the fully-mounted ‘8’ models. It all started with the angle sensor that allowed operators to adjust the pitch without any mechanical stops. The ISObus-compatible Turn Control Pro system on the Juwel 8TCP went one step further. In addition to having many settings at the touch of a button, it also features automatic furrow straightening with the help of GPS.
The ‘i’ equipment on the Juwel 8 ploughs takes this to another level of sophistication. Notable features include easier ploughing thanks to presets and the refined GPS-based control system. This comes with a caveat – but more on that later.
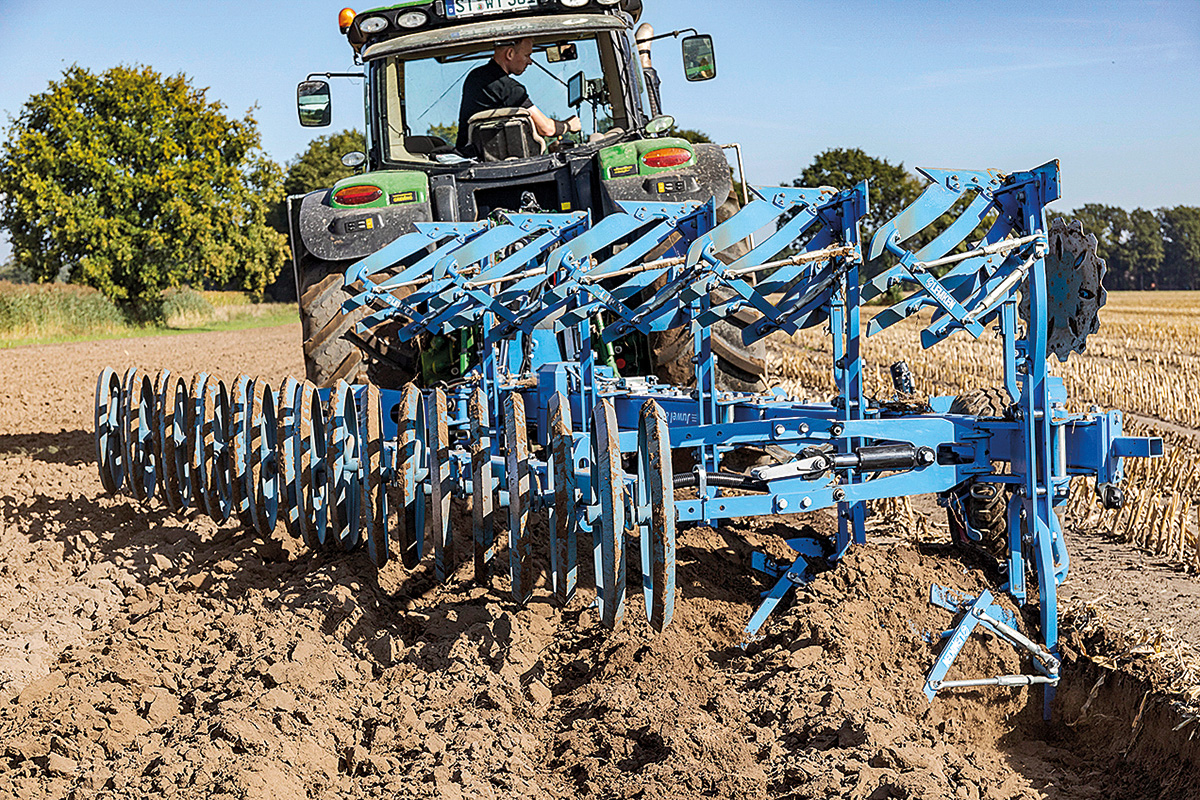
We got our hands on one of the new Juwel 8i ploughs to do a spot of ploughing over a few days last autumn.
Almost identical hardware
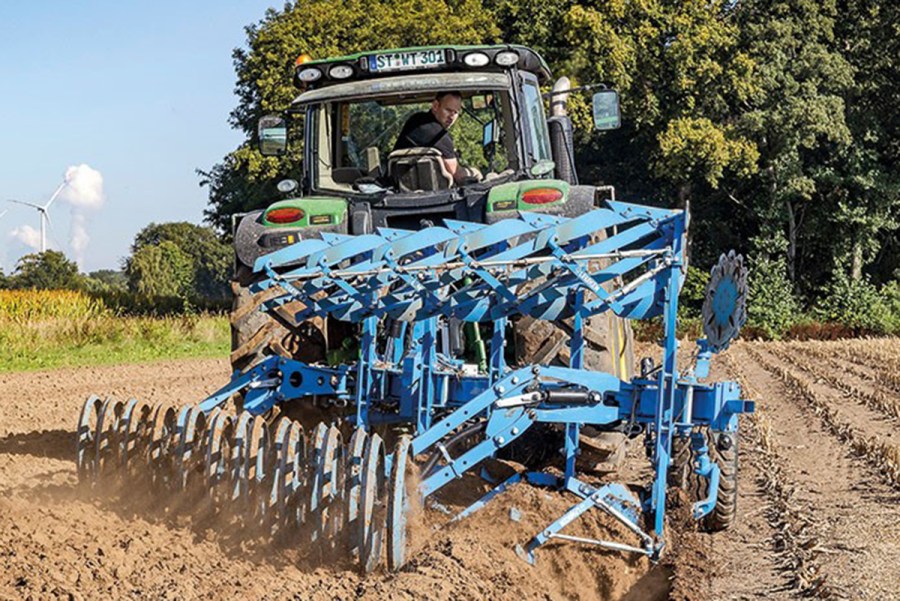
The four-, five- and six-furrow Juwel 8i with ISObus is based on the 8MV model with an underbody clearance of 80cm and interbody spacing of 100cm, with the main beam steel measuring 140cm x 140cm and 10mm thick. Our rest ‘i’ plough had the optional 86cm underbody clearance, with this extra 5cm clearance costing £77 per furrow.
There are other Juwel models within the Lemken range with different size beams and options, but these are not offered as an ‘i’ ISObus plough.
In the entry-level ‘i’ version, the ISObus equipment includes electronic adjustment of the front furrow and working width as well as pitch. There is the option of setting the depth wheel via the terminal (£3,721). The FlexPack mounted press (£11,642) that was on our test plough is also integrated into the control system. On the OF onland version (£3,139), a ram is integrated here instead of the spindle for adjusting the draft point, and note that ploughing in-furrow is still possible with the OF.
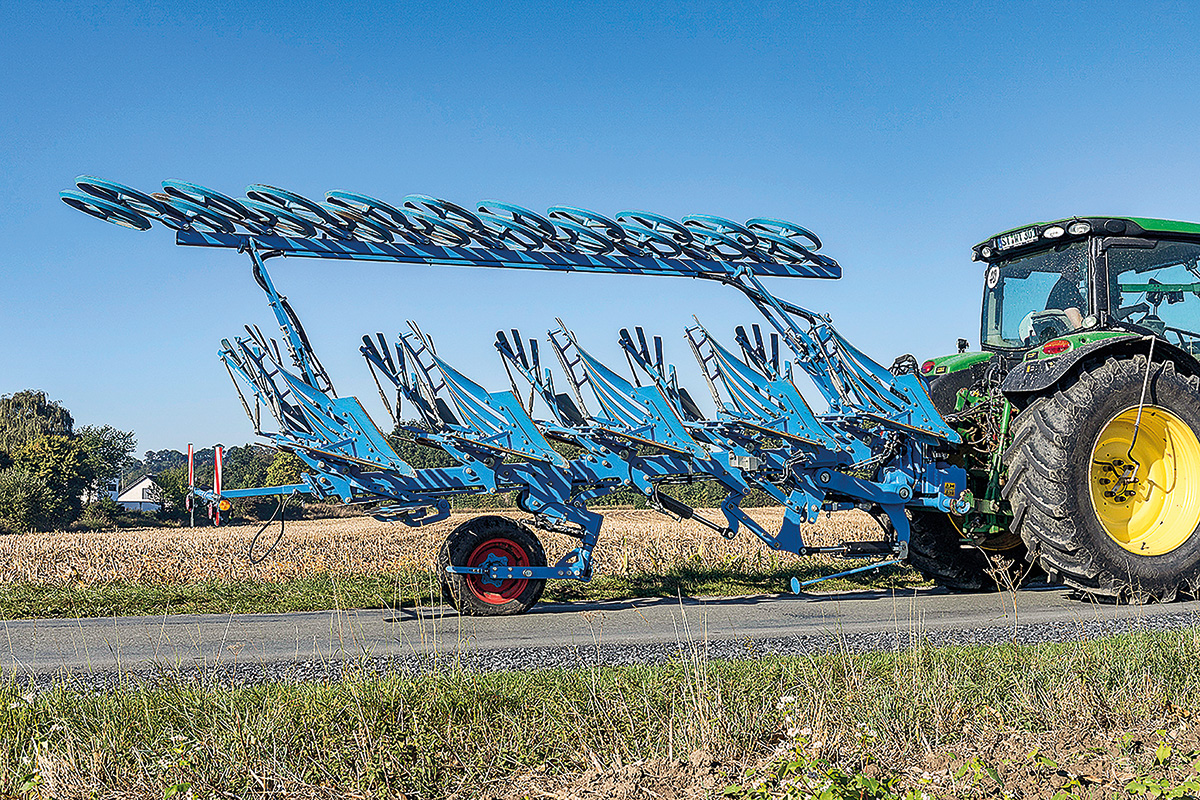
The depth wheel needs to be swapped over for travelling on the road. The transport settings can be conveniently selected on the terminal.
The electronic heart of the 8i beats in two places. On the one hand, the ISObus job computer is installed under a black cover on the right-hand side of the headstock. There’s also a control unit for sensors and actuators on the frame; these allow you to control the plough at the touch of a button. Various hydraulic valves on the beam and headstock are tasked with implementing the commands. The pipe routing was not that tidy on the test plough, although Lemken says this will be sorted when the 8i reaches production.
Light bulb moment when attaching
The first ‘i’ benefit is apparent when you go to hitch up to the plough. As long as the previous user selected the parking position on the terminal, then the Cat III lower link bar should be sited parallel with the ground, something that is not always the case with a conventional plough. This makes hitching up very straightforward.
Next, the hydraulic pipes … of which there are just the three load-sensing lines required.
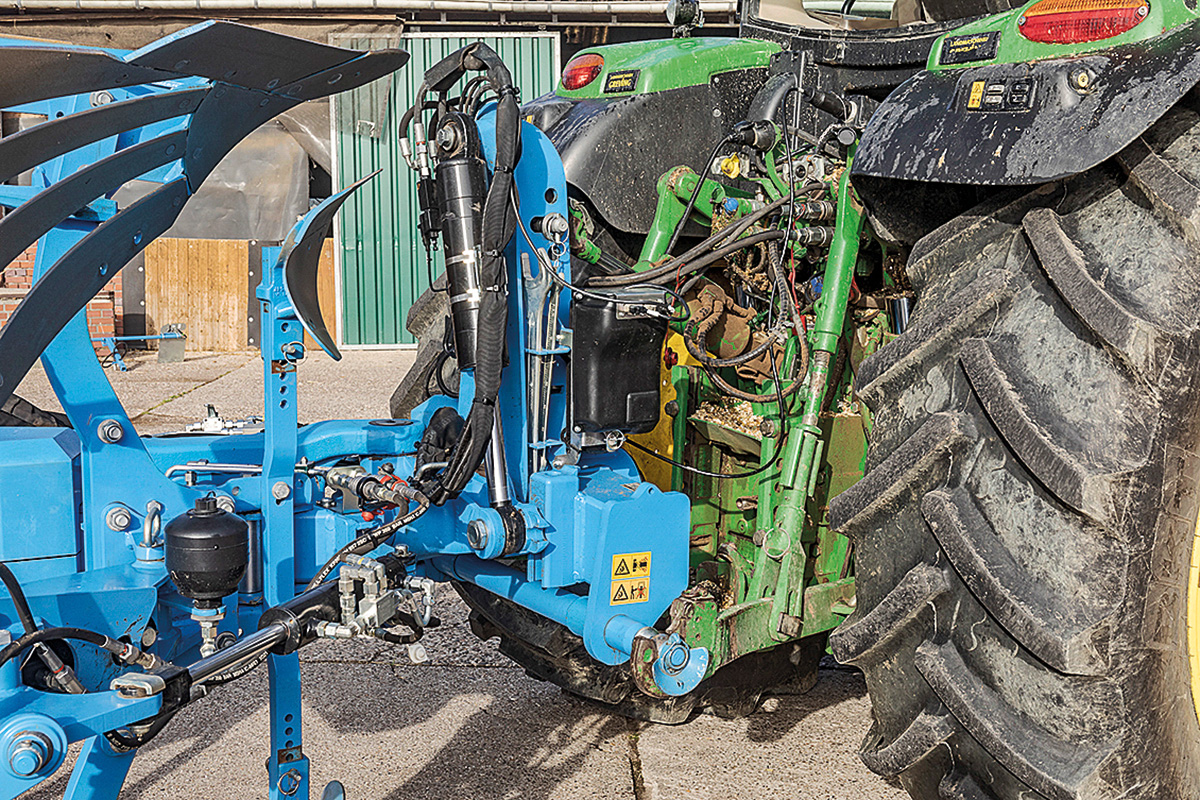
Attachment is straightforward thanks to the horizontal lower link shaft and just three hydraulic pipes.
That’s all, despite the plough boasting so many functions. The valve coupling job is quick and easy, too, provided the connectors suit, which is not always the case, as tractor makers fit different sizes. Don’t forget the ISObus connector and, if you have them, plug in the optional (£853) road lights. That’s it: you’re done and ready to go.
As for the tractor, the five-furrow Juwel 8i is theoretically fine with 150hp in many conditions. However, tractors in this bracket will soon reach their limit because of the FlexPack, the over-500kg integrated press making a noticeable contribution to the weight of the plough. The John Deere 6150R we used needed at least 2.2t of front ballast, so we’d suggest that a 180-200hp tractor is a better match for the tested outfit … to truly boss the plough.
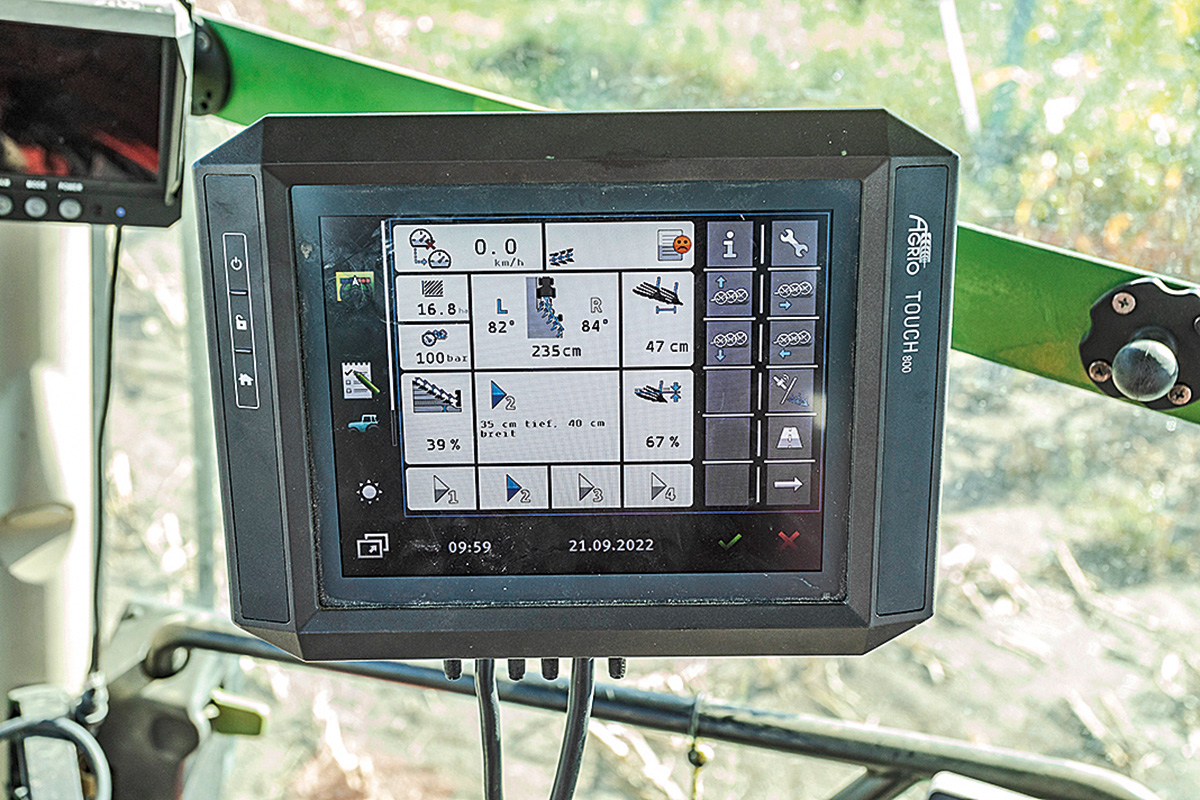
For the ISObus, you’ll need a compatible terminal; this can be the existing tractor terminal to which the plough is assigned, or another display. We operated the plough with a Müller Touch 800 as well as a CCI1200 without any problems.
Even with existing screens, we were always able to operate the plough without any connection problems.
Compared to its predecessor, the interface has been revamped so it follows a similar format to Lemken’s other control boxes. The main screen provides a good overview of all current settings for working width, pitch, depth and front furrow width.
Ploughing with scenarios
The four scenarios (eight with the on-land version) are also prominently placed on the main view. The current selected scenario is displayed larger and has a description. The operator can assign a specific name to each scenario (i.e. memory), and they can enter settings for right and left pitch, working width, depth and front furrow width.
To call up a scenario, tap the button and tap again. The plough then retrieves the stored settings for this scenario. The arrow in the screen tile turns green — all very clear. Using the scenarios is very practical and helps to find the optimal settings. If users want to try something out or just make short-term adjustments, they can quickly return to the initial settings.
The logic behind it is also clear: as long as the arrow on the scenario field has a green background, the stored settings are also active. If something is changed, the green colour disappears. To restore the scenario, the driver simply selects it again. If they want to save the new setting to the scenario, just press the scenario button and hold it for a few seconds — very good.
We liked being able to quickly swap between the scenarios in the field. However, once you have programmed two scenarios (one for marking out the field and the other for the final pass) you only have two others for the actual plough settings. That’s not enough, especially if you want to work without the FlexPack, as you’ll need different settings. Extra scenarios would be useful for different conditions, ploughing depths and soil types, and would dramatically save time inputting adjustments.
Ploughing straight ahead
You don’t really need GPS-controlled width adjustment for straight ploughing, but, like so many other jobs, it does help. If you want to upgrade the Juwel 8i to this level, a CCI ISObus terminal is required … which is the drawback referred to at the beginning. You also need licences for the GPS working width control, CCI.Command PT and CCI.Command SC. This licence package costs £2,872 and requires a good DGPS signal, either from the tractor and via the ISObus or via an antenna connected directly to the terminal.
It also demands a signal from the tractor for the working position of the linkage — again either via ISObus or via the signal socket. The source and the settings for working and raised positions can be changed using the terminal. The speed signal is also picked up from the tractor or alternatively via GPS. In this spec, it is possible to enter settings for the target working width as well as for the minimum and maximum working width. CCI.Command also requires an A-B line, which can be a contour, too. Once a scenario is selected, the guide function can now be switched on.
In work, the terminal distinguishes between the reference line and the wayline. The wayline serves as the current reference line.
It is nudged towards the next pass each time the plough is raised up out of work. The reference line is the line that is currently closest to the combination.
The system controls the plough whenever the wayline and reference line are identical. Whenever the reference line moves away from the wayline — e.g. because the furrow is too far off course — the system pauses. The operator can recognise this pause from the difference between the numbers of the two lines. If it’s necessary to raise the plough mid-work, without making a headland turn, the wayline feature stops counting. This means that, in practice, it is tricky to make any manual adjustments to the wayline. Should it be necessary for the user to tweak the wayline — for example, after catching up on an awkward patch, you can nudge the wayline back to the correct reference line by pressing a button.
The last furrow: when you need to shallow the back body, the operator just presses a button.
Ploughing towards a target line
The system allows operators to easily work towards a target A-B line. This could be the opposite edge of a non-rectangular field or a target contour. The procedure is that the operator sets an A-B line or contour that runs alongside the target line. This is done without actually ploughing. The operator then ploughs the first furrow on the opposite side and then aligns the working line and the reference line, preferably when the combination is in that field corner that is closest to the A-B line. From then on the plough now controls the width towards the target contour.
As the diagram ‘Ploughing towards an end furrow’ shows, the plough doesn’t continuously regulate the width as it works across the field. Instead, it tries to plough along the wayline for as long as possible, until it progressively achieves a diagonal line. The relatively abrupt angle in the illustration is more of a curve in practice. The number of up-and-down passes needed until the plough reaches the target contour depends on the set parameters for the work width. The illustration overleaf shows a simple example. In the areas where the finish line has already been reached, the plough works at its target width and otherwise keeps the furrow pretty straight. When it reaches the wedge, the plough then operates between its target and maximum width, not between minimum and maximum.
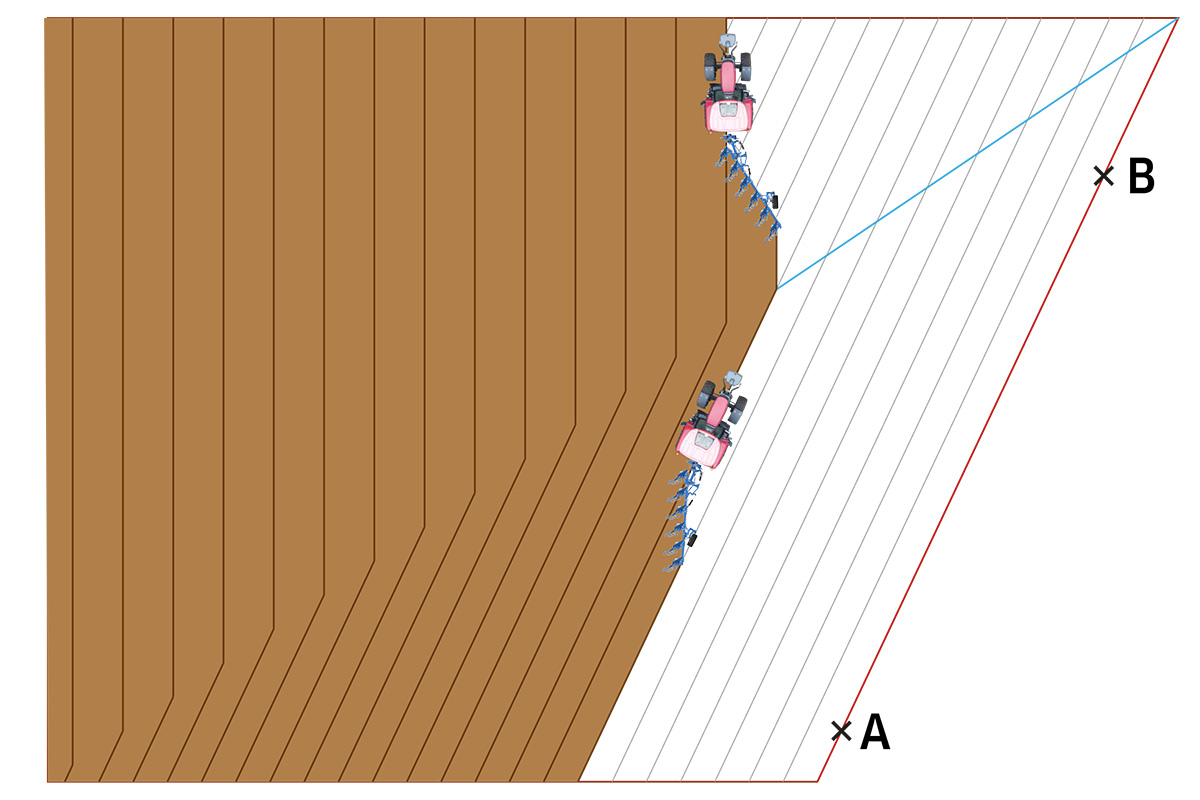
This is how the control system directs the plough to the targeted end furrow, which was set up at the beginning: it expands the area of the target working width on the target line continuously. Outside the controlled range, the plough is ploughing at its maximum width. The angle is in fact more of a curve. Illustration: Stefan Tovornik.
In other words, if the maximum width is set to 2.50m, the target width to 2.00m and the minimum width to 1.70m, the control range for ploughing the awkward patch is 0.50m. With a 20m difference in the field width at the top and bottom, it therefore takes at least 40 passes to reach the finishing A-B line in the top corner.
The type of ploughing can also be used to control the range of the working width. If you want a rather coarse winter furrow in heavy soil, a narrow setting is not ideal. Vice versa, too wide a furrow setting for autumn ploughing will mean more work for the power harrow. Light and medium soils, on the other hand, give you more options.
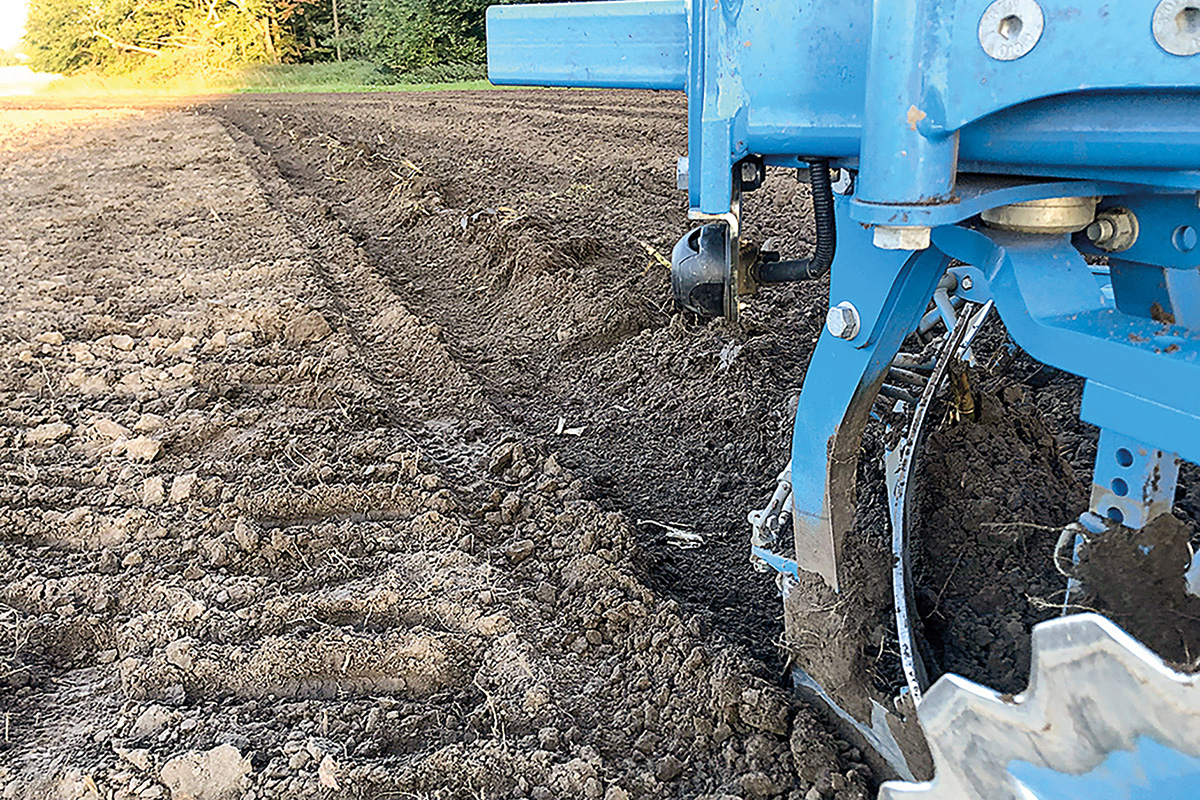
Ploughing with a packer
The FlexPack was convincing in the test, which was mostly on light and medium soils. The press is permanently attached to the plough, and the controls are integrated into the plough control system. However, the parking position is not monitored, although this would be possible in connection with the working position or the scenarios. If the press is in its transport position, there may be an issue if the breakback system trips after hitting a stone.
The FlexPack simultaneously adjusts its working width with the plough. At the edge of the field, it can be retracted with care. Even in this position, it continues working. The packer control is integrated into the turnover control.
The FlexPack can be raised out of work. The electronics make it possible to quickly change the settings.
The FlexPack can be pressurised to two selectable pressures by operating the swivel cylinders. It takes on weight from the plough for reconsolidation.
Other details
- The plough is turned over by pressing a button on the terminal. The function, like many other settings, can be assigned to the aux controls of the ISObus (Aux-N) — for example, on a tractor joystick.
- The working depth is set on the land wheel in % or centimetre increments. The cm option requires calibrating the depth in two positions. This must be repeated when soil conditions change.
- The speed at which all hydraulic functions are executed can be easily adjusted from the ISObus terminal — very convenient.
- In the future, the Juwel 8i will link up to Agrirouter and receive updates from the Internet.
- The plough should definitely be operated by a hydraulic top link, so that all of the adjustments can be made without leaving the cab.
Summary
The Juwel 8i builds on a comprehensive package of hydraulics and electronics as a base specification. This makes setting up the plough very easy. The different scenarios offer operators a good way to fall back on tried and tested settings.
You can, but don’t have to use GPS. This requires some significant upgrading of what is an expensive plough in the first place. We reckon this will probably be reserved to special requirements. However, the clever feature of ploughing towards an end furrow, in particular, gives an idea of what will be possible in the future in terms of autonomous implement control.
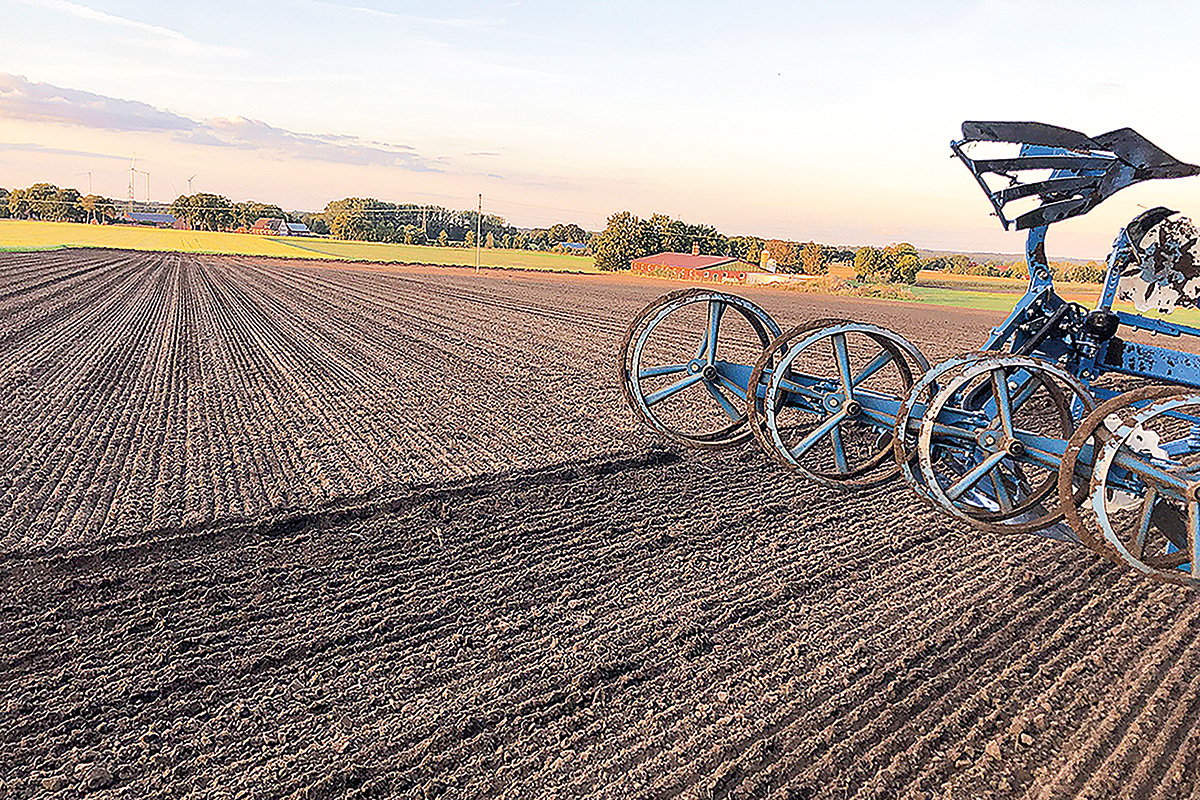
The end result is an excellent finish, especially on medium and light soils.
For more up-to-date farming news click here and subscribe now to profi for more tractor tests for just £3.99 an issue.
Click here for the PDF version of this Tractor Test.